
Wednesday, November 17, 2010
Monday, November 8, 2010

Friday, November 5, 2010
Christmas Card

Here is an adorable Christmas card I did for our Christmas Stamp Camp:
Stamp Sets Used: CTMH Captured Moments C1423, Jingle Borders D1225
Colors: Pacifica and Chocolate
Accents: Copper Brads, Glitz Stardust Glitter Z1313
Friday, October 29, 2010


Wednesday, October 20, 2010
Cards - Circle of Love Stamp Set

Here are 3 beautiful cards using the Close to my Heart - Circle of Love stamp set.
All Cards are Standard 4 1/4 x 5 1/2 Card
Card 1:
Flower B & T paper is 3 x 5 1/2
Polka Dot B & T is 2 x 5 1/2
White 1 3/4 x 4 1/4
Stamp image on white c.s. and cut twice 1 7/16
Barn Red Cardstock to layer is 2 x 1 5/8
The word family is on a white piece of cardstock which is 1 3/4 x 1
Card 2:
Cut (2) pieces of B & T paper to 1 1/2 x 12
Score every 1/2 on them
Fold back and forth like a fan
Glue the two edges together
Push together and glue center with either hot glue or liquid glass
Other Pieces uses are:
Cocoa Cardstock 3 1/4 x 3 1/4
Ivory B & T Paper 3 x 3
White 5 1/4 x 4
Lagoon Cardstock 5 1/2 4 1/4
Card 3:
Cut 2 pieces of B & t paper to 4 1/4 x 3
Cocoa Cardstock is 5 1/2 x 2 5/8
White cardstock is 5 1/2 x 2 1/2
Trim white cardstock close to stmaping after it is stamped
Emboss image with white embossing powder.
Color image using sponge daubers. This will resist the white embossing area and
give you a pretty colored image.
Wednesday, September 22, 2010
Halloween Layout!


Here is a cute Halloween layout we did. We used the White Daisy stamp pad, Fancy Fuzz, and did a technique called Joesph's Coat. This is seen in the top right corner (the skull) Here is how its done.
1) Color a piece of glossy paper with lighter colors. Yellow, greens and purples is what I used.
2) Stamp image with Versa Mark stamp pad
3) Clear emboss the image
4) Then take a darker colors such as black, dark brown etc. and brayer over top of it.
5) Wipe with a paper towel and you will see the beautiful color image you stamped.
Have fun trying this. I saw this on Stamp TV.
Wednesday, September 15, 2010

Wednesday, August 25, 2010
August - Cards
3 Fun Cards to try:

This is a 4 1/4 x 5 1/2 in. card.
Squares are 2 1/2 x 2 1/2, 2 x 2, and (2) 1 1/2 x 1 1/2. The middle square with a flower on it is a white piece of cardstock that is 2 x 2.
The white 2 x 2 piece of of cardstock is colored with a rubber brayer and inked.
Then I embossed my image with black embossing powder.
Then I took a brush with some bleach and colored in the center of the flower. Gives you a pretty cool look! Enjoy.

Once again this is a 4 1/4 x 5 1/2 in. card.
The Green cardstock is 1 3/4 x 5 1/2
Vineyard Berry cardstock is 1 1/2 x 5 1/2, and 2 3/4 x 2
White cardstock is 1 1/4 x 5 1/2 and 2 1/2 x 1 3/4
Stamp leaves in black. Then on the 1 1/4 x 5 1/2 white piece of cardstock stamp leaves in color. Layer up to match over top the black and white images.

This is a fun card once again using a rubber brayer.
ink your brayer with several colors. Then bounce the brayer around the card to give it a cool tie dye look!
Tuesday, August 10, 2010
June Scrapbooking Club - Black & White Photos

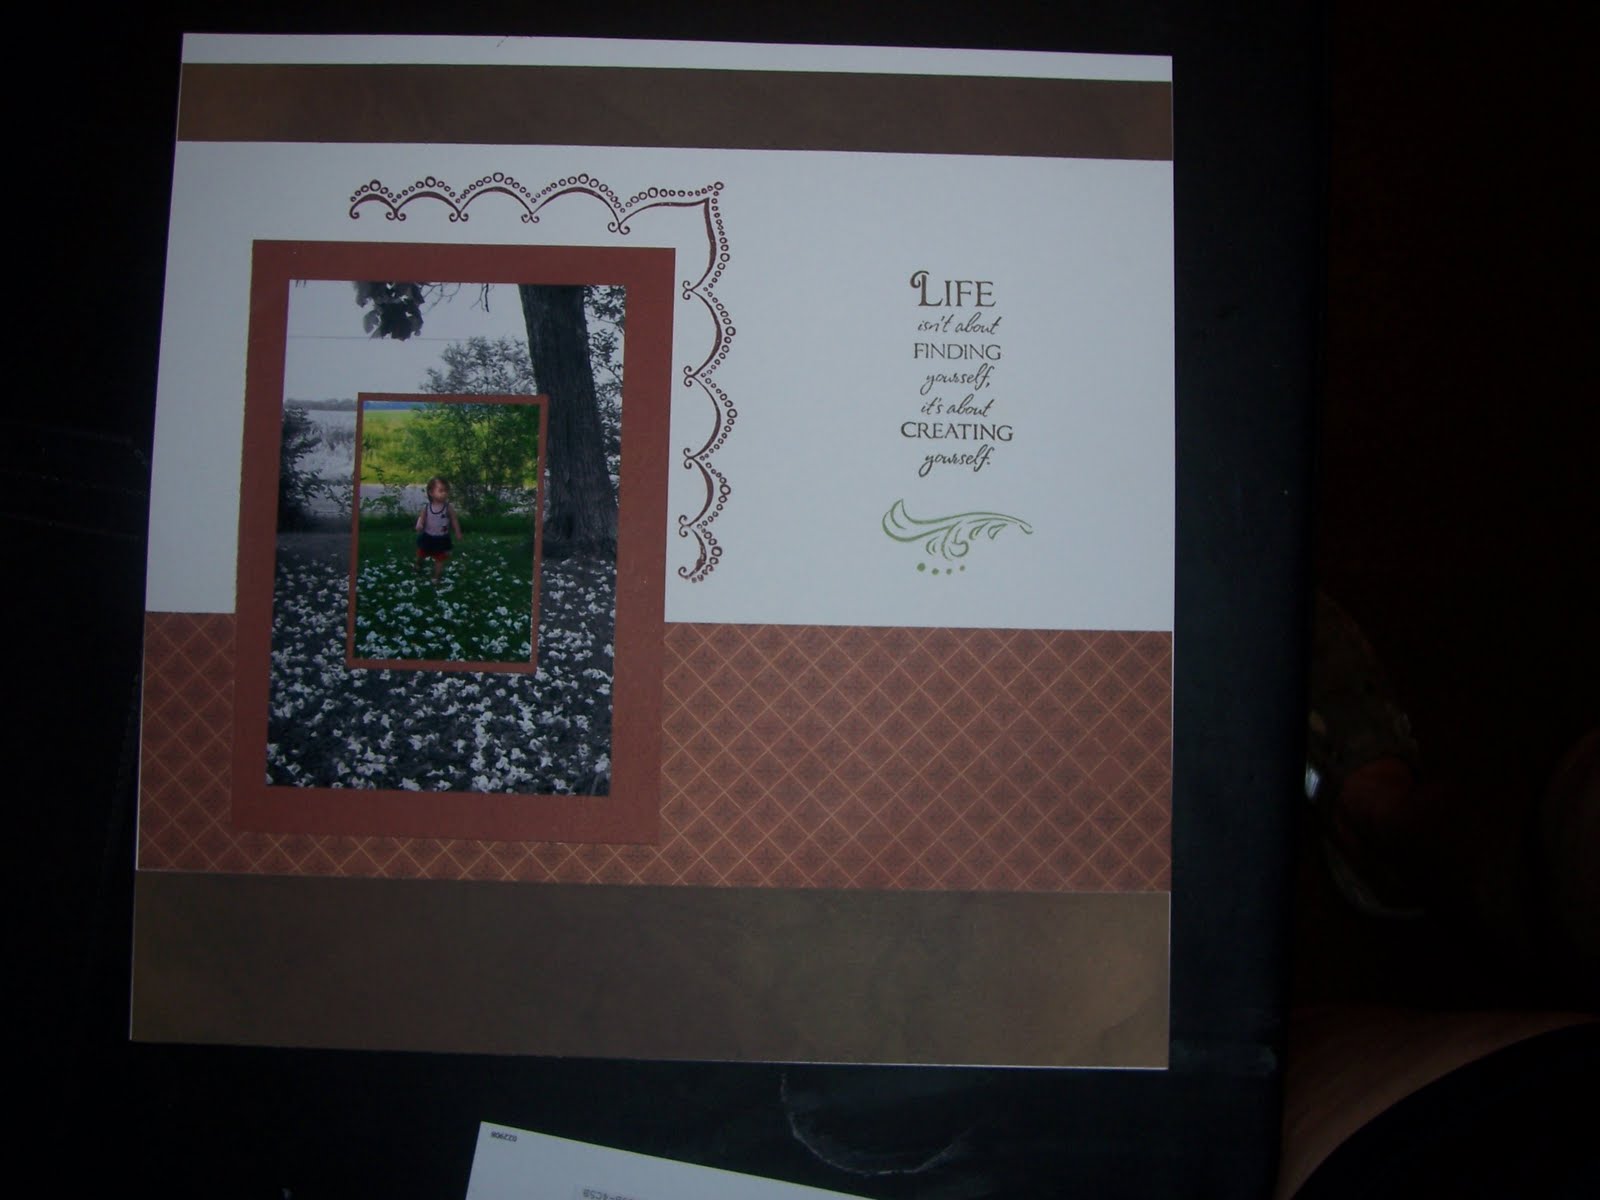
We took a Black and white photo and a colored photo of the same and layered them over each other to give your page a very cool look!
Monday, August 2, 2010
$2, $4, $6, for 8…
2, 4, 6, 8, who do we appreciate? It’s YOU, of course!
We are shouting from the rooftops how much we love and appreciate
you! It only makes sense to pass along our appreciation with amazing deals. So for 8 days, August 4 through August 11 (while supplies
last), you can purchase select My Stickease® Assortments for only $2 US/CAN, My Reflections® Level 1 kits for only $4, and
My Reflections® Level 2 paper packets for only $6 online. Visit www.stmaphappy.myctmh.com today to see these amazing
deals for yourself. You’ll want to shout for joy, too!
Wednesday, July 7, 2010

Sunday, June 6, 2010
May Club - Clear Card & Purse


Here is a clear card we made along with a cute little purse. It was all about flowers!
To make the purse The base Cardstock is 8.5 x 11, socred at 3.5", 4.5", 5.5", 9" and 9.5". Finished size is 3.5 x 8.5
April Club - Scrapbook Page

Here is a page we did in my April club. We tore the pictures to try something new and then chalked the edges. Here is the layout we created.
Saturday, March 20, 2010
March Club Projects
Here are the 3 club projects we did in March!
These great ideas came from splitcoaststampers.
I have the links below for you to view the directions and videos for yourselves.
Enjoy!
Easter Basket

View this project at:
http://www.splitcoaststampers.com/resources/tutorials/easterbasket/
Folded Frame Card

View this project at:
http://www.splitcoaststampers.com/resources/tutorials/foldedframe/
Easel Card

View this project by splitcoaststampers at: http://www.splitcoaststampers.com/resources/tutorials/easelcard/
Sunday, March 7, 2010
March - Dare to Dream!
Dare to Dream!
Join Close To My Heart in March and
Receive Four Exclusive New Stamp Sets FREE!
Be your own boss with flexible hours and unlimited earning
potential when you join Close To My Heart as a new Consultant
this March. When you join, you will receive four new stamp sets
free! The retail value of the free stamp sets total $91.80, which
nearly covers the price of your New Consultant Kit*. When all is
said and done, you will receive more than $400 in fabulous new
products to get your dream business started.
Now is the time to make your stamping dreams come true! Ask
me about joining our incredible team today.
March Stamp of the Month - A Little Everything
You are sure to love the March SOTM: A Little Everything - This is a great stamp set for all year round. Look in the back of your catalog for details on how you can get this great stamp set!


Monday, February 22, 2010
A Blog to Share With You
I received this from a friend and just wanted to share it with all of you. Her blog is AWESOME! She had lots of great cricut videos and giveaways.

Tuesday, February 2, 2010

February CTMH Special

FEBRUARY CTMH SPECIAL
Our hearts go out to the victims of the earthquake in Haiti,
and like so many of you, we’re eager to help. And helping
has never been easier! Throughout February, purchase a
12" x 12" textured cardstock combo pack and you’ll get one FREE—
and with every offer purchased, Close To My Heart will donate $2
US to Operation Smile’s Haiti relief efforts. That means for only
$14.95 US, you get two packs of our high-quality textured cardstock
and you help this urgent, important cause.
Offer valid February 1–28, 2010. Tax and shipping/handling charges may
apply. Donations to Haiti will be made by Close To My Heart on your behalf to
Operation Smile’s relief efforts. To learn more about their efforts visit
www.operationsmile.org/haiti
Thursday, January 14, 2010
Card Box
Here is the adorable card box we made to keep all of your cards organized.
Found this awesome project and the directions from http://stamptv.ning.com
She has a great video of the project if you would like to check it out.


Decorative Greeting Card Holder
Items Needed:
Kleenex Box
Scoring Tools
Cardstock
Ribbon 18”
Background Paper
Adhesive or Score Tape
Pull box apart on one side and pull out tissue. Then open other end of box. Finally pull last seam so box opens flat
Cut Cardstock (4) 5” x 4 ¼” – for inside of box
(2) 4 ¼” x 4 ¼” – for inside and outside bottom of the box
(1) 5” x 11” – for outer perameter of box
Score this piece at 1”, 5 ½” and 10”
(1)5” x 9” – Score at 4 ½”
Inside tabs are 4 ¼ x 4 ½
Circles for tabs were 1 ¾
Two circles on outside of box are 3 ¾ and 3 ½
Cut Background paper (5) 4” x 4”
(4) 4 ¼” x 4” – Score these at 2”
Take tissue box and cut top of box off
Attach cardstock to inside of box (2) 5 x 4 ¼ and (1) 4 ¼ x 4 ¼
Put Kleenex box back together and finish lining with (2) 5 x 4 ¼ pieces of cardstock
Cover the bottom of box with 4 ¼ x 4 ¼ piece of cardstock
Take longer piece of cardstock the 5 x 11 piece and fold score lines and adhear around outside of box.
Take the 5 x 9 piece of cardstock and adhear around remaining box
Add (4) pieces of 4 x 4 background paper over the outside bottom of the box. Add (1) piece of 4 x 4 background paper to the bottom of the box if you would like.
Take the 4 ¼ x 4 background paper and fold the scored line. Adhear to the top of the box with the 2” side folding into the inside of the box.
Wrap ribbon around seam area.
Decorate the front of box to your liking.
Finish your tabs as you like as well.
Subscribe to:
Posts (Atom)